How to Improve Your Hunting Trophy Photos
It’s been twenty years, but I’ll never forget that day. The storm had left nearly a foot of fresh snow and it was bitterly cold. I was deep in the timber, high up on a ridge in southern Iowa. It was almost noon on day four of Iowa’s fabled firearm deer season. Laying dead in the snow not far from my tree stand was the biggest buck I had ever shot. Actually, it was the only decent buck I had ever taken.
The rest of the day was an emotional one for me. It was the celebration that comes from finally taking a great buck after years of trying, mixed with the sadness that comes with taking the life of such a magnificent animal. What I didn’t realize at the time was how lucky I was to be sharing camp with a well-known outdoor writer and expert photographer. He provided me with cherished photos of that day and a better understanding of how to make a great hunting trophy photo. Here’s what I’ve learned from that session and over the years since about how you can improve your hunting trophy photos.
Setting, background, and light
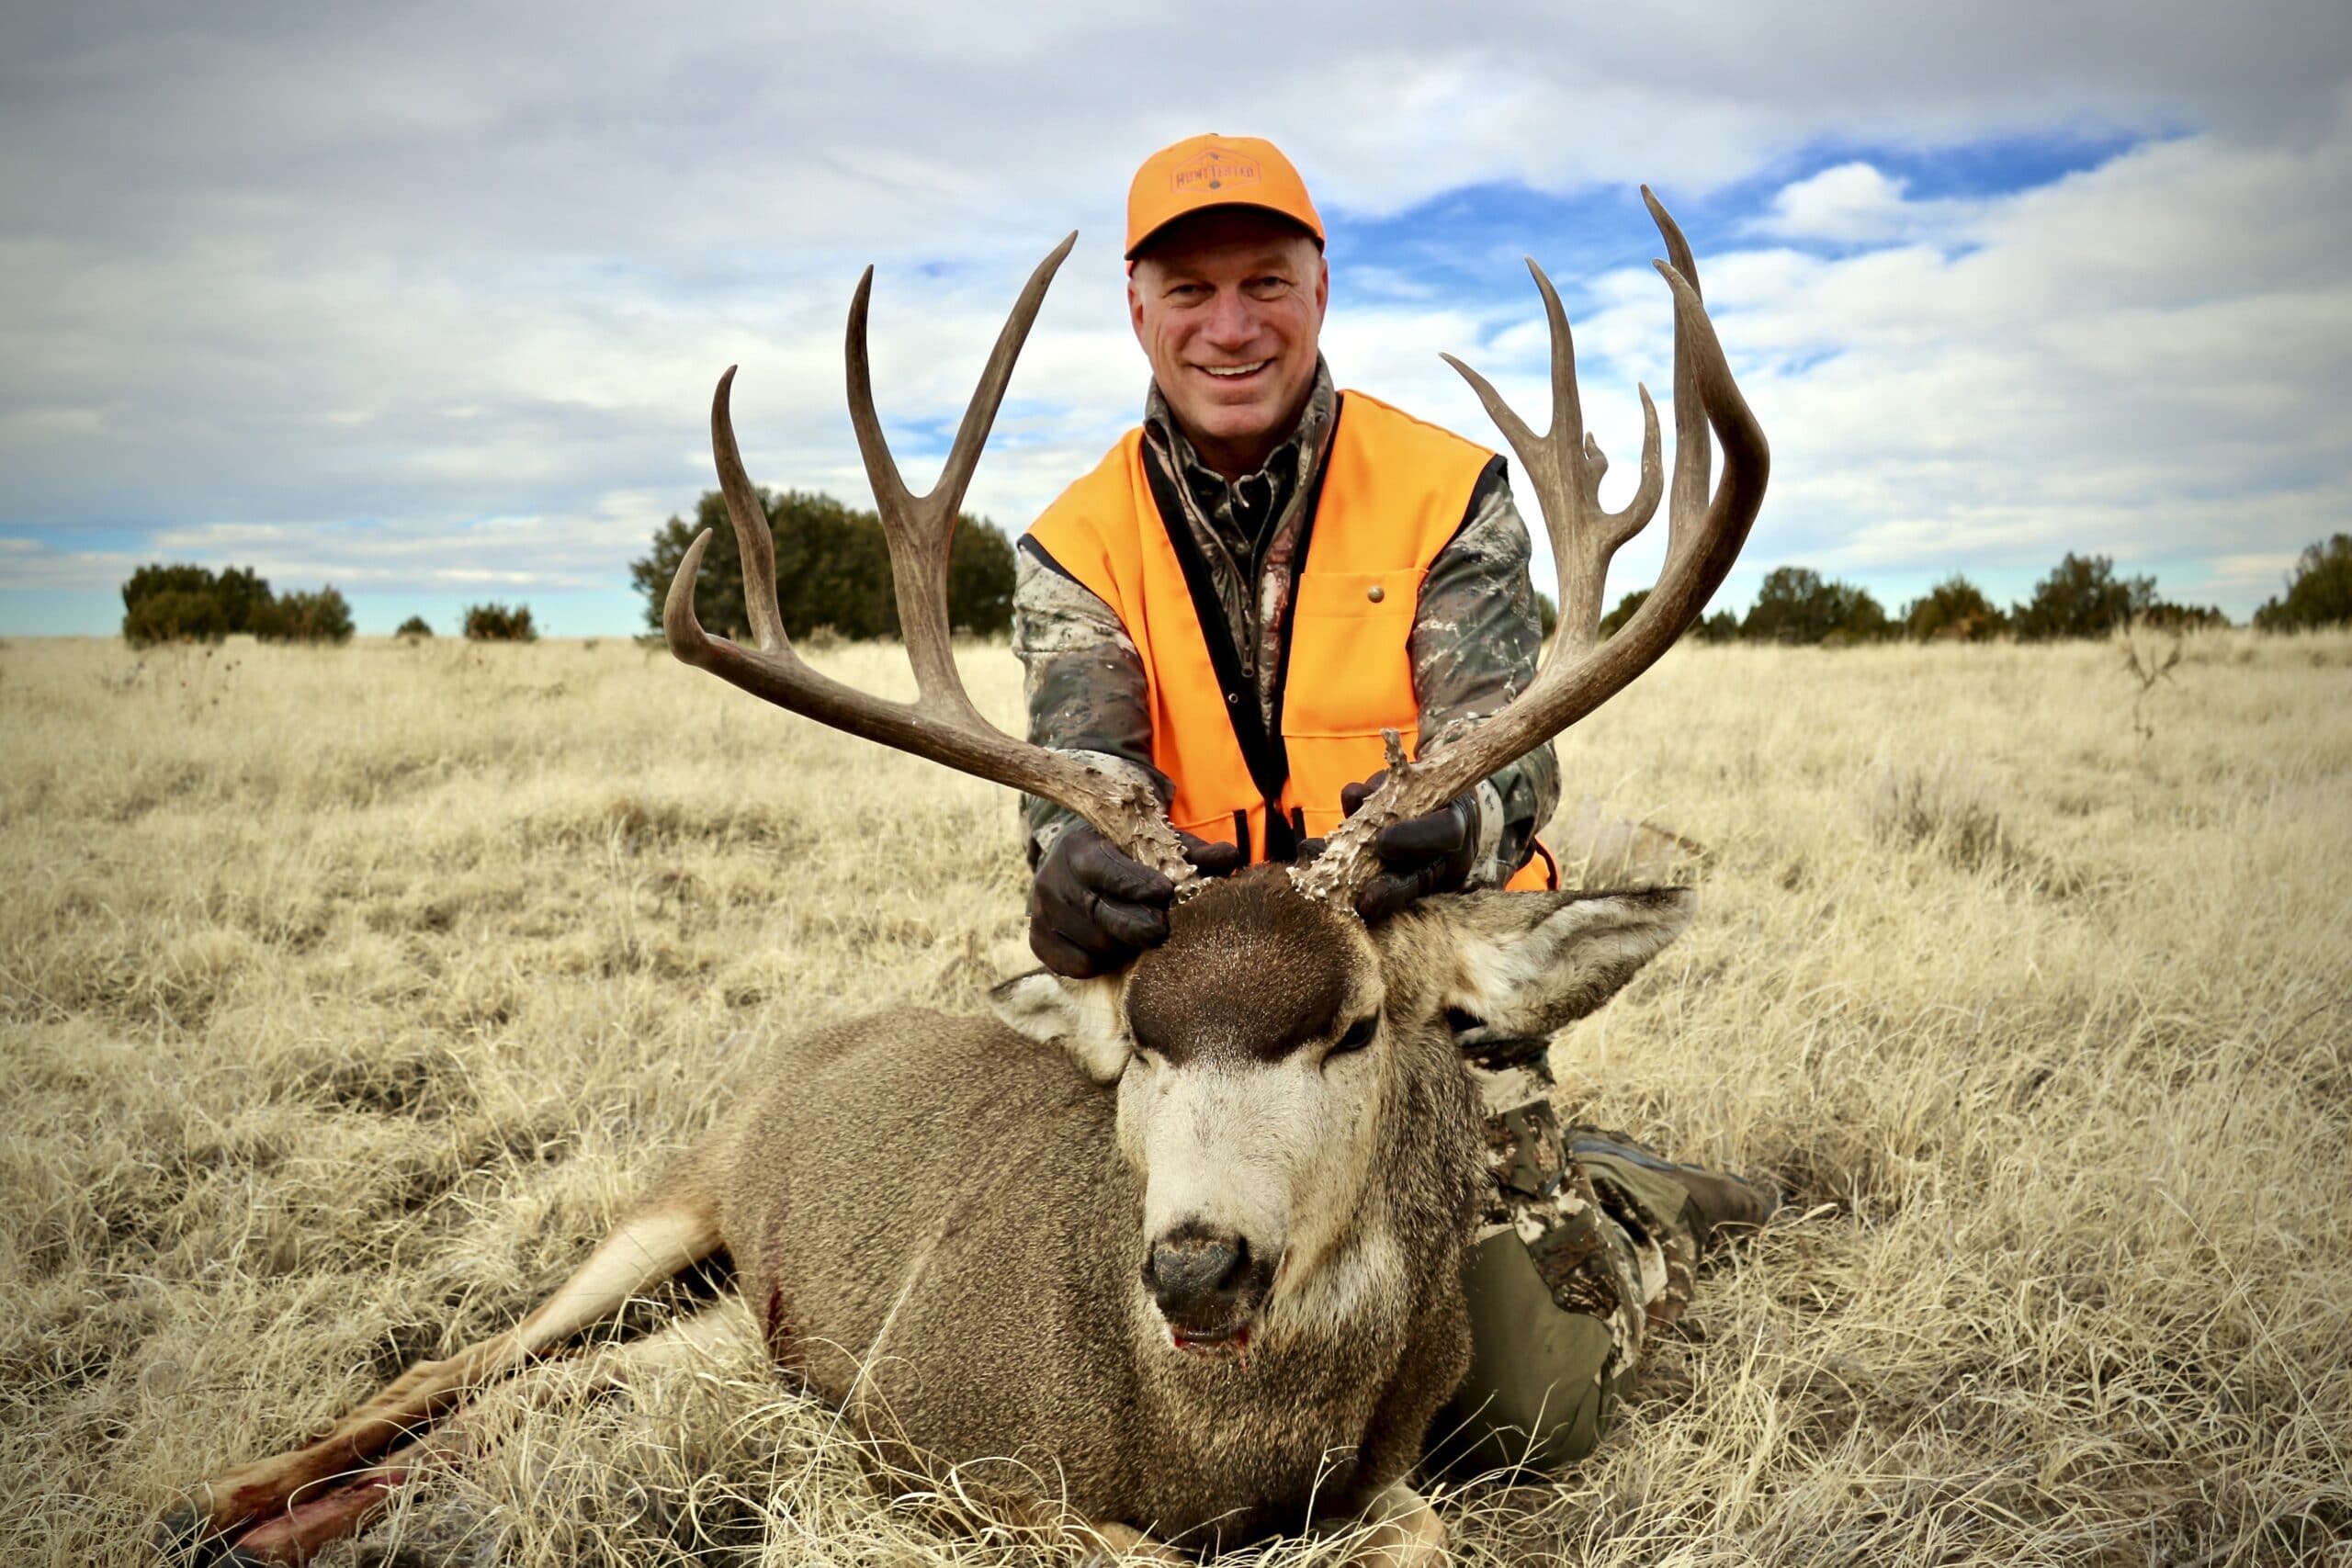
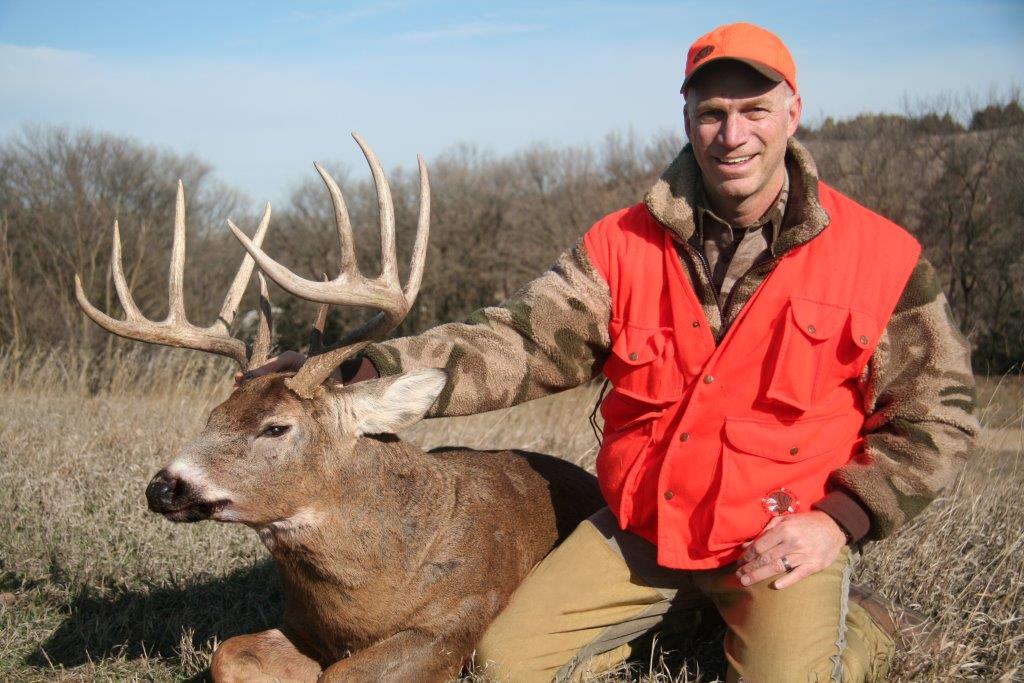
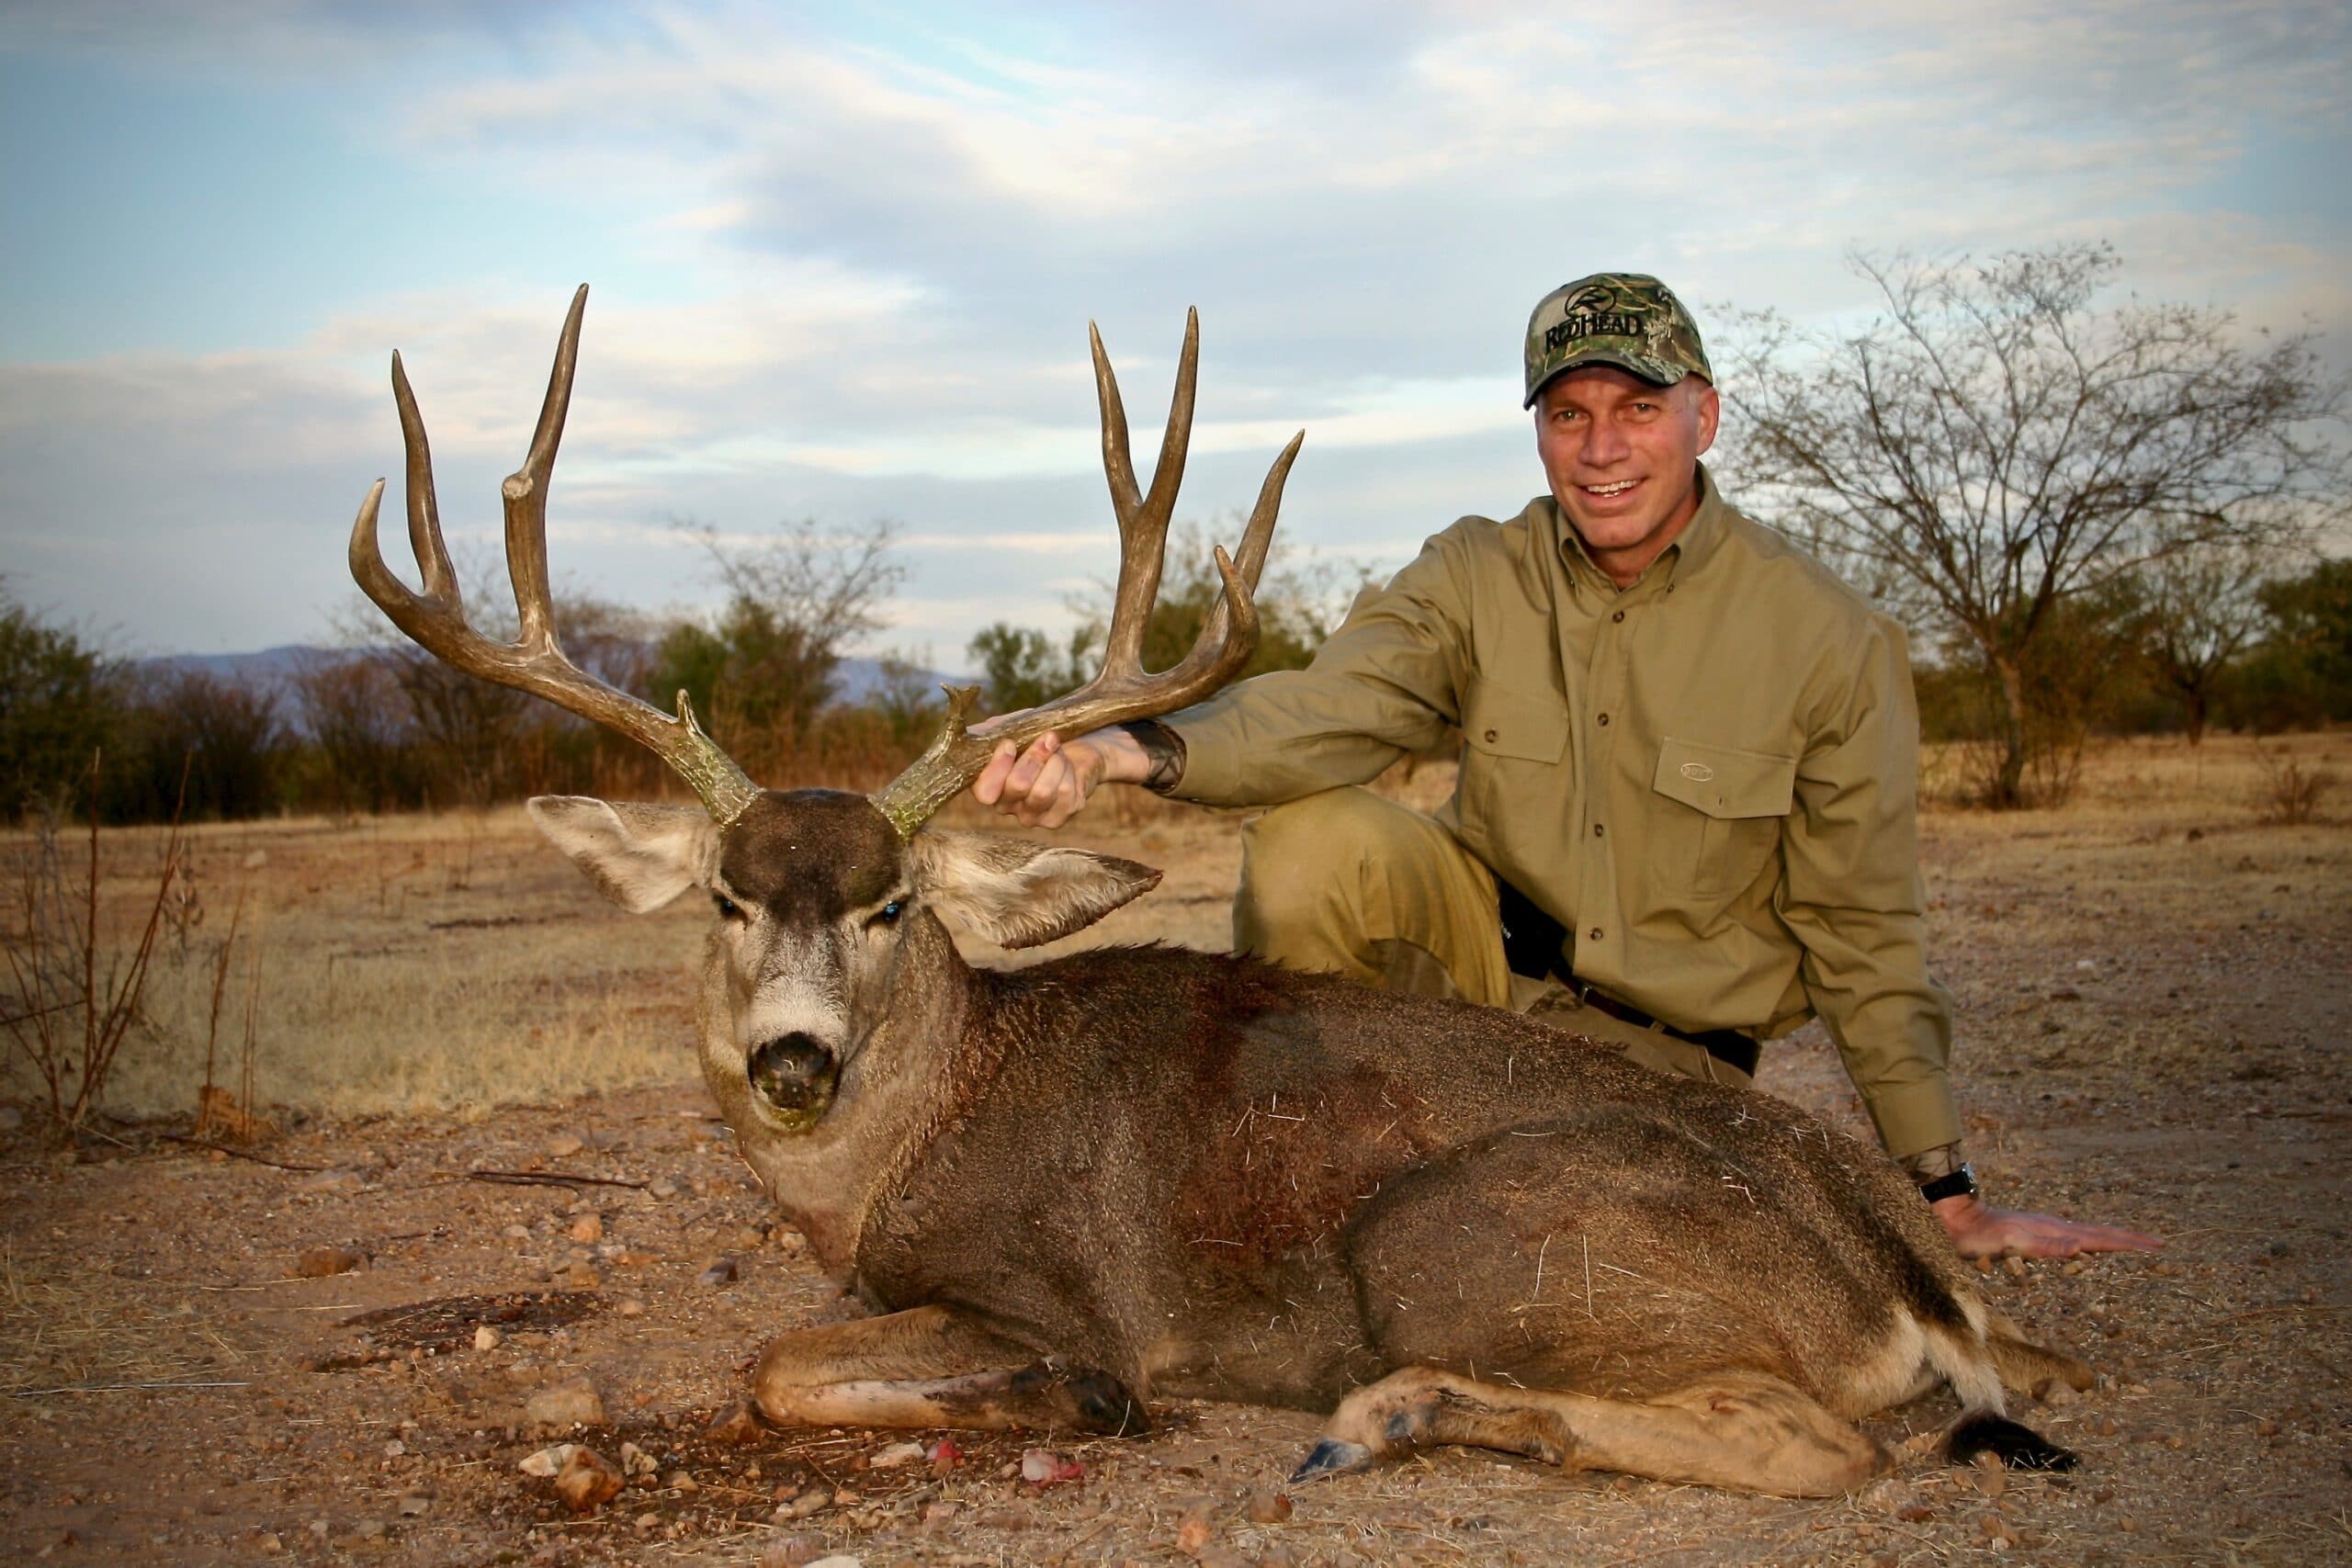
The spot where your trophy fell may be ideal for a photo. But, if the brush is too thick, or the background is too busy it just won’t make for a nice image. You may want to move it to a better location. If you intend to display the antlers of a deer or elk, look for a background that provides some contrast. I’ll look for the highest spot close to my location. The high point allows the photographer to get below the subject so the antlers can be set against the sky for contrast. Some of the best trophy photos I’ve seen were on a hill providing a great view of the countryside in the distance behind the subject.
A hunter can’t dictate the time of day or light conditions. When the chance for a trophy photo arises, make the most of the current conditions. If you’re taking the photo, the sun should be behind you. Pay attention to the shadows on the hunter and the animal. On a sunny day, the hunter’s face may be covered in shadow. They may need to tip their cap brim up. In low light conditions, a flash may be needed and can work surprisingly well, even in the dark.
Composition and Perspective
As a photographer, take photos from many different angles. Have the hunter hold a position, then move from one side to the other. Take photos from a kneeling or sitting position, then try some holding the camera even lower. You’d be amazed at how a trophy photo can change based on the angle. If it’s a really large deer, it can look giant when the hunter is slightly behind the deer with arms forward and you fill the frame with the rack.
As the hunter, you can help ensure a good photo. Plant your knee on the ground behind the buck in such a way that the buck is sitting upright, with legs tucked under it. Hold the rack with thumb and index finger rather than your whole hand, which can cover too much of the rack. Better yet, hold the rack with just one hand. Rotate the rack as the photographer snaps photos, changing the perspective. Tilt backward and forward and left to right. Then review the images to see what you like best, then ask for a few more from that perspective.
Taking Photos When Hunting Alone
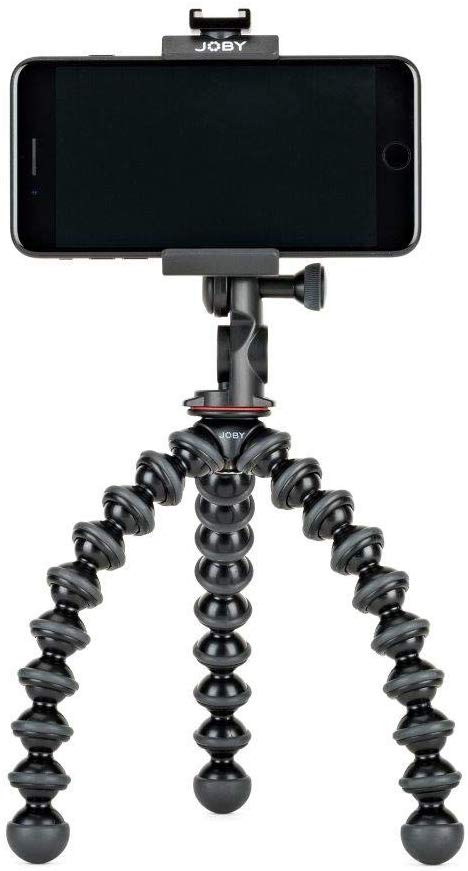
It’s easy if you have an experienced buddy on your hunt who can snap a bunch of photos for you with your trophy. If your hunting partner hasn’t taken many photos, however, you can help them through it with the tips in this article. If you’re hunting alone, you can use the self-timer or time-lapse feature on your camera to take your own pictures. I’ve done it successfully on a few occasions. It just takes a little planning. You’ll need to bring the right camera and something to hold it for you. I’ve used a tripod, a backpack, or even the gear bag from the back of my ATV to set the camera on.
Pro Tip: Get familiar with how to use the self-timer mode on your phone or camera, before you need to use it in the field
Gear to Ensure a Great Hunting Trophy Photo
While the camera in your smartphone is great, it’s still not quite on par with the quality of a digital camera. Here’s what I carry in my backpack or keep in the truck for taking hunting trophy photos.
- Olympus T-6 If you’re looking for a rugged waterproof camera for outdoor use, you won’t do better than the T-6. It takes crisp photos, amazing video, and has an easy-to-use self-timer feature for trophy images when you’re by yourself in the field.
- A small flexible tripod like the Joby Gorilla Pod. You can use this particular tripod to hold your phone or a camera.
- An extra battery.
Hunting Trophy Photos Definite Don’ts
As hunters, it’s crucial that any trophy photo shows respect to the animal that we’ve just harvested. This is especially important when posting on social media, where much of your audience may be comprised of non-hunters. They may not understand the effort, time, land management, heritage, and ethics that went into your successful hunt. They only see a hunter smiling next to the animal that he or she just took the life of. Remove any visible blood, or show from a different angle, and tuck the tongue in its mouth if hanging out. Don’t take the photo in the back of the truck or while it’s hanging in the garage, remove any litter, trash, or branches that may distract from the image, and never sit on the animal.
Final Thoughts on How to Improve Your Hunting Trophy Photos
Often the key to taking a good photo is putting in the time and effort to take a bunch of them. Heck, digital photos cost nothing, so why not keep taking pictures until you’re certain there’s a great one in the mix. When a big buck is down, there’s a lot of emotion and a tendency to get started on field dressing. Be intentional about taking the time to capture the moment with a great photo. As the years go by, you’ll be really glad you did.
By HuntTested Contributing Editor, Jeff Boehler
Note: HuntTested may receive a small commission if you purchase a product from the links on this page. This does NOT increase your price and helps to pay for the content you’re enjoying.
Related Content: The Ultimate Whitetail Deer Gear List